On The Rack

If building Ikea is like putting together a lego house, then assembling wine racking is more like building something out of Linkin’ Logs. Or a giant Jenga game.

As I had mentioned in an earlier post, I came to regret leaving the old wine cellar racking in Edmonton, when I discovered that Ikea no longer made it. Or at least, that they had changed it. Interestingly, in this case it has become more expensive. Based upon their Gorm shelving system, it used to be a really cost effective way of storing your wine bottles. The cost has effectively doubled, in that you need both a shelf and a rack frame, rather than what was essentially a shelf with some slats nailed to it. It wasn’t pretty, but it was functional, and my philosophy had always been to spend money on the wine, rather than the storage.

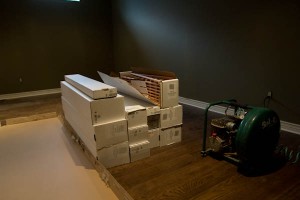
This is an entire wine cellar. Some assembly required.

Fortunately, I found a solution at Rosehill Wine Cellars, using their modular redwood wine racks. They are surprisingly cost effective (a little more than Ikea’s current solution, but a whole lot nicer on the eyes) and flexible. I had done some planning over the winter, and had managed to come up with a configuration that would work in the new cellar and meet our storage needs.

Like playing Jenga. Your challenge is to take all of this…

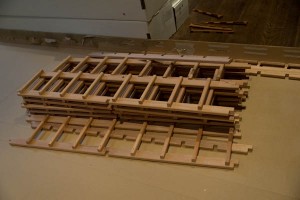
The next challenge was to actually build it. What I picked up Rosehill Wine Cellars was a variety of very small, very light boxes (at least, when compared to Ikea wardrobes). Opening said boxes, however, revealed a pile of wood pieces strategically cut and notched, all of which had to be assembled to create said rack. Preferred assembly technique was to use a nail gun, and a huge number of nails.

…and turn it into this. Without nail-gunning your finger, the floor or anyone else.

I started with a base, which I managed to cobble together using melamine-covered particle board and adjustable legs from Lee Valley Tools. This gave me a strong base that could be adjusted in order to make it level, and should pretty much disappear visually once the racking was built and stocked with bottles.
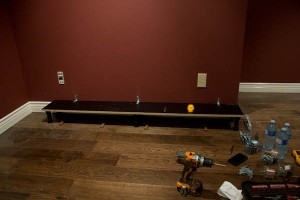
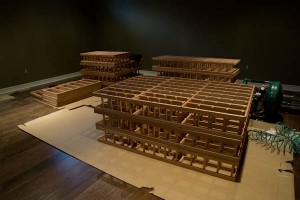
The base. Melamine covered particle board, and adjustable feet. It’s level, and that’s what matters.

The base was the easy part. Then it got to building the individual racks. Once you had reviewed the instructions and built one, the rest became logical. Fiddly, but logical. The challenge was to assemble all of the pieces to create a rack, manage to get it square, and then nail the corners in place without everything falling back apart. There were instances where that required a good five or six attempts to accomplish.

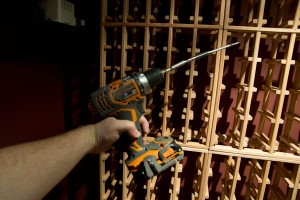
What was left at the end of the day was a set of assembled racks that were ready for installation. This involved attaching brackets to each rack, and bolting them to the wall behind using drywall anchors and screws. Conceptually, this is something fairly straightforward and logical. The reality is that the depth of the racks when installed is 9″, which means you need a very long screwdriver or very small hands to fit them inside the rack. I had neither.

MacGyvering a very long screwdriver. Kids, don’t try this at home.

What I did have, however, was a power drill and a number of screwdriver bits. That, connected with two quick-change bits, gave me a long—but ridiculously unwieldy—screwdriver head. Torque suffered, and I’m sure there are any number of health-and-safety professionals that would have conniptions over my technique, but it got the job done.

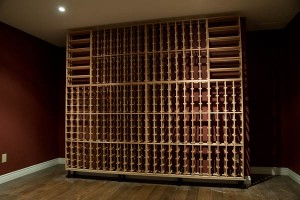
The finished result. Custom look, cost effective prices.

The end result is that we now have a wine cellar that, for a reasonable amount of money, looks pretty damned awesome. It’s not a custom racking solution by any stretch of the imagination, but those can run into the tens of thousands of dollars (and again, who wants to spend that much on storage when you can be out buying wine instead?) But at the sometime, it very nearly looks like a custom solution. And even better, it has capacity for something north of 830 bottles. Which should keep us going for awhile.

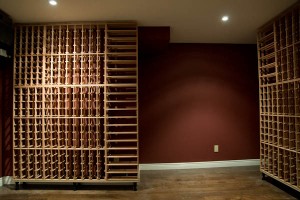
More space for expansion. Spend money on wine, not storage.

We do have room for expansion, though, should we need it.

An Ikea Odyssey: Part 3

While I had averted dealing with the wardrobes on the first day of construction (with the notable exception of moving nine very large and heavy boxes up a narrow and bending staircase) that just meant that they were patiently awaiting my arrival the next morning.

Wardrobes are like bookshelves, only larger. Much, much larger.

Pax as a wardrobe system is surprisingly flexible but nonetheless relatively uncomplicated. You start with a basic frame, and fill it with whatever bits and pieces are required to create the closet of your dreams, whether drawers, hanger bars, shoe trees or storage boxes. Assembly is, in my experience, best approached in the same way; build the frames and get them to where you want them, and then worry about installing the interior fittings.

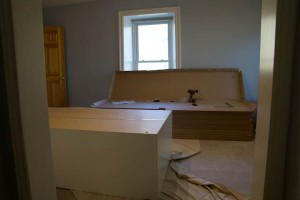
According to the plan, the wardrobe units that I had picked should fit pretty well perfectly in our new walk-in closet, without making the space feel overwhelmed. While that may be true, the more wardrobe frames you build, the less space you have for the assembly of future wardrobe frames. The result was the creeping sensation that the walls were closing in. Which,in effect, they were.

If it feels like the walls are closing in, it’s only because they are.

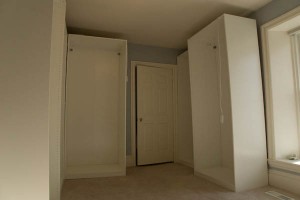
Assembly was relatively straightforward, in that the frames work like bookshelves but on a very large scale. The result is larger, heavier and more unwieldy, but still largely based upon the same principle. Unpack, frame, slide, bang and struggle to get upright. Repeat eight times. By the end of the day, I had nine completed wardrobe frames. Not full wardrobes, mind you, because they were all empty. But the frames were in place.

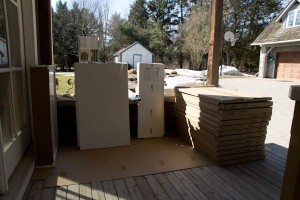
What that meant was an unplanned third day to actually deal with all of the innards that would make the wardrobes functional. I got an early start that Saturday, getting to Boo Manor shortly after 9am. The first order of business was figuring out where to assemble everything. The old kitchen island is still on the front porch, and has been used as everything from a desk to a workbench so far during the renovation; that would work for me. An hour spent lugging the boxes for the interior out of the garage, and I was ready to get started.

Outdoor Ikea warehouse? Nope, just all the stuff to be assembled.

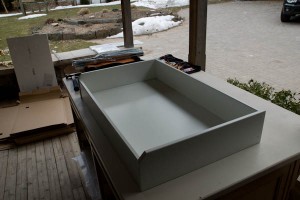
My basic strategy was to fill the contents of one wardrobe at a time. That meant unpacking, assembling and/or building whatever items were required, bringing them upstairs, and installing them in the appropriate wardrobe frame. Many of those innards were drawers. These were each their own little assembly sub-project, individually wrapped with their own little packet of screws and hardware. By the time I was finished, twenty-six drawers later, assembly time for a single drawer was less than five minutes.

A drawer. One of 26. By the end, assemble was sub-five-minutes.

Possibly the most excruciating item to assemble was a shoe rack, however. Appealing in principle, the rack rolled into a frame and offered storage for up to 12 pairs of shoes. What that translates into in reality is 24 little metal tubes that need to be separately bolted to the rack with Ikea’s trademark Allen key, one at a time. After that, 24 little plastic shoe forms needed to be clipped into place, before the whole thing could be installed. Great result, but I’m glad that I had to only build one of them.

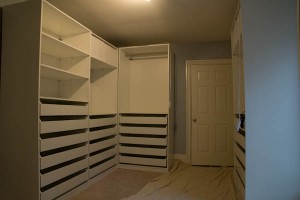
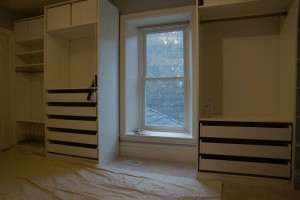
The finished product. With lots of drawers.

Despite the early start, the process lasted the entire day. As 6:30 rolled around on the clock, I was finally in the process of cleaning up, packing my tools and getting ready to drive back to the city. Behind me, I left five bookshelves and nine completed wardrobes, ready for us to move in. Impressively, when all was said and done, there was not a single missing piece of hardware or damaged panel. No emergency return trips to Ikea required, and any swearing and cursing regarding the process of assembly was entirely my own doing.

Astonishingly, it all fit. And went together. With no missing hardware or damaged pieces.

An Ikea Odyssey: Part 2

I am not female, so this is entirely speculation on my part, and may just result in either censure or hysterics from the women in my life who know better. But I suspect that building Ikea furniture is a little like childbirth: the pain of the act eventually fades until you reach a point where you are bafflingly willing to consider doing it again.

Recognizing that assembly would be a mammoth undertaking, I had in fact booked off two days to assemble all of the various bits of Ikea. This might seem excessive to some, and laughably inadequate to others. It was, on balance, my best-guess estimate of what it would take based upon previous assemblies. Like I said, the pain fades…

It had been my original intent to start with the wardrobes, and move on to the bookshelves (under the basic presumption that if you tackle the worst of it first, it all starts to look downhill from there). Unfortunately, those plans went out the window pretty much at the outset. I couldn’t lift the wardrobes on my own (one box weighs in at something approaching 140 lbs. of unwieldy, eight-foot long box) and the help that I had beseeched wouldn’t be arriving until later in the morning. So we’ll start with the bookshelves instead.

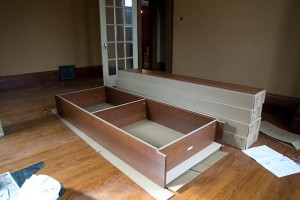
One bookshelf down, four to go. Unpack, frame, assemble; repeat as necessary.

Over the years, I have built many Billy shelves. It is the ubiquitous, go-to solution for large, cost-effective and relatively sturdy book storage, and has been for some time. Although I have to say that the quality of Billy has declined over time; like so many of us, his early strength and burnished looks have sagged and faded. The overall finished product look roughly the same, but the quality of the parts and materials has declined—presumably in an effort to keep costs down. Higher density fibre board is now particle board; metal parts are now plastic. Had I been aware of how much they have changed between now and this time around, I’m not sure I would have still gone there.

While this might just be a case of buyers remorse, it wasn’t going to get the bookshelves assembled. There was really nothing for it but to get on with building them. The mechanics of assembly is pretty straightforward, and you quickly fall into a zen-like routine of unpacking, framing, sliding, hammering and inserting fiddly doo-hickies. The entire process is hard on the knees, but otherwise surprisingly meditative.

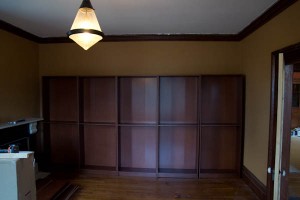
I didn’t realize quite how well they would fill the wall…

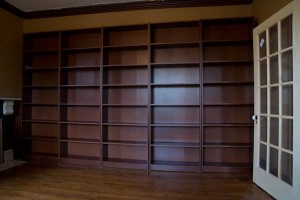
I had measured the room to figure out how many shelves would fit along the wall, which gave me five boxes to assemble (plus extensions). While I knew they would fit, I didn’t realize quite how closely they would match the room’s dimensions. By the end of the day, I had a wall of shelves. They actually fill the room quite perfectly. And match the colours of the existing woodwork surprisingly well. After some adjustments to deal with the fact that the floor is not as flat as I might like, I was able to finish my day with the bookshelves completed.

One day down, one completed wall of shelves.

For pre-fabricated shelves, they are perfectly serviceable, although I do miss the Billys of old. I have no plans on moving these any time soon, however. So as long as they stay where they are, they should hold up reasonably well.