On The Rack

If building Ikea is like putting together a lego house, then assembling wine racking is more like building something out of Linkin’ Logs. Or a giant Jenga game.

As I had mentioned in an earlier post, I came to regret leaving the old wine cellar racking in Edmonton, when I discovered that Ikea no longer made it. Or at least, that they had changed it. Interestingly, in this case it has become more expensive. Based upon their Gorm shelving system, it used to be a really cost effective way of storing your wine bottles. The cost has effectively doubled, in that you need both a shelf and a rack frame, rather than what was essentially a shelf with some slats nailed to it. It wasn’t pretty, but it was functional, and my philosophy had always been to spend money on the wine, rather than the storage.

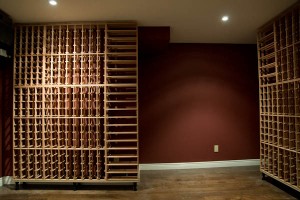
This is an entire wine cellar. Some assembly required.

Fortunately, I found a solution at Rosehill Wine Cellars, using their modular redwood wine racks. They are surprisingly cost effective (a little more than Ikea’s current solution, but a whole lot nicer on the eyes) and flexible. I had done some planning over the winter, and had managed to come up with a configuration that would work in the new cellar and meet our storage needs.

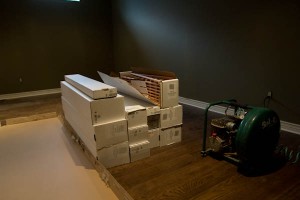
Like playing Jenga. Your challenge is to take all of this…

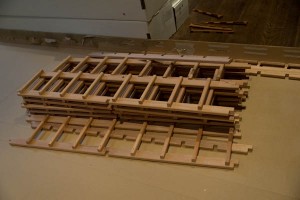
The next challenge was to actually build it. What I picked up Rosehill Wine Cellars was a variety of very small, very light boxes (at least, when compared to Ikea wardrobes). Opening said boxes, however, revealed a pile of wood pieces strategically cut and notched, all of which had to be assembled to create said rack. Preferred assembly technique was to use a nail gun, and a huge number of nails.

…and turn it into this. Without nail-gunning your finger, the floor or anyone else.

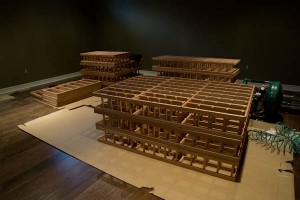
I started with a base, which I managed to cobble together using melamine-covered particle board and adjustable legs from Lee Valley Tools. This gave me a strong base that could be adjusted in order to make it level, and should pretty much disappear visually once the racking was built and stocked with bottles.
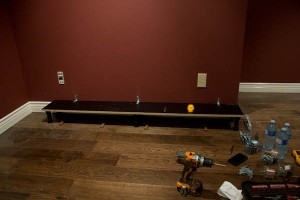
The base. Melamine covered particle board, and adjustable feet. It’s level, and that’s what matters.

The base was the easy part. Then it got to building the individual racks. Once you had reviewed the instructions and built one, the rest became logical. Fiddly, but logical. The challenge was to assemble all of the pieces to create a rack, manage to get it square, and then nail the corners in place without everything falling back apart. There were instances where that required a good five or six attempts to accomplish.

What was left at the end of the day was a set of assembled racks that were ready for installation. This involved attaching brackets to each rack, and bolting them to the wall behind using drywall anchors and screws. Conceptually, this is something fairly straightforward and logical. The reality is that the depth of the racks when installed is 9″, which means you need a very long screwdriver or very small hands to fit them inside the rack. I had neither.

MacGyvering a very long screwdriver. Kids, don’t try this at home.

What I did have, however, was a power drill and a number of screwdriver bits. That, connected with two quick-change bits, gave me a long—but ridiculously unwieldy—screwdriver head. Torque suffered, and I’m sure there are any number of health-and-safety professionals that would have conniptions over my technique, but it got the job done.

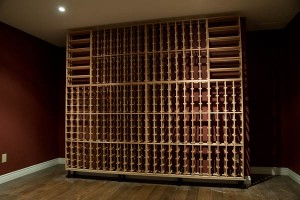
The finished result. Custom look, cost effective prices.

The end result is that we now have a wine cellar that, for a reasonable amount of money, looks pretty damned awesome. It’s not a custom racking solution by any stretch of the imagination, but those can run into the tens of thousands of dollars (and again, who wants to spend that much on storage when you can be out buying wine instead?) But at the sometime, it very nearly looks like a custom solution. And even better, it has capacity for something north of 830 bottles. Which should keep us going for awhile.

More space for expansion. Spend money on wine, not storage.

We do have room for expansion, though, should we need it.
Whining About Wine

Boo Manor will have a wine room. This is pretty much a given with any of our houses, of course. In our last house in Edmonton, we went through two different rooms before we were done. We started with a smaller room, built into the north-west corner, that was only controlled by being built into a concrete corner of an underground room in a city in a cold climate. In other words, the temperature varied considerably, which wine doesn’t necessarily like. And our collection grew enough that we eventually started shoving cases in, shutting the door, and pretending that we were organized.

This led us to turning our storage room into our wine room, our wine room into our storage room, and using the storage room as the exhaust point for an actual climate control system. In doing so, we learned a lot about the dynamics of controlling temperature in wine rooms, and how climate control systems work (and don’t work). This subsequently led to us excavating a six-inch duct in our newly poured foundation, and hooking up an exhaust system from the climate control unit to the outside (as all we had done prior to that was turn the ‘storage’ room into a sauna, while cooling the wines not at all).

Building Boo Manor, therefore, we are determined to do it right. This involves finding an appropriate control system to incorporate into a basement that won’t support our previous system, and finding shelving that will work for our new collection. Prior to this, we’ve used Gorm shelving from Ikea, which used to come with shelves that were specifically designed to hold wine bottles. Our previous cellar, which held close to 1,000 bottles, cost all of $400 for the shelving. Now, you need to buy normal Gorm shelves at $5 a pop, and then spend an additional $3.50 on a metal rack that goes on top of the shelf. While this will still get you there from here, it’s starting to drive the costs up considerably.

At the same time, custom-built wine cellars generally scale into the thousands-of-dollars, and I have no interest in going there. I am far less fussed about what my wine cellar looks like than the wine going in it, and if I’m going to spend a few thousand dollars then it’s going to be on wine, not on the shelving. This means that it is necessary to look at some different options, and cost out what makes sense.

I had already selected a vendor for the cooling unit, Rosehill Wine Cellars of Toronto. They had provided the previous cooling unit when we were in Edmonton, and now that we are in Ontario they even count as a local vendor. They also stock any number of other bits of paraphernalia for the wine connoisseur, from wine glasses and decanters (definitely overpriced) to shelving (which ranges from the spectacularly expensive to the surprisingly-not-bad). While talking to them about our plans for a new cooling unit for Boo Manor’s cellar, Dianne noticed that their display racking was configured to hold 700+ bottles in what still constituted a reasonably priced arrangement. And so we think we have found a solution.

The great thing about the shelving in question in that it is infinitely configurable. It is designed to hold normal bottles, small bottles and slightly-larger-than-normal burgundy and champagne bottles (which otherwise defiantly refuse to be stored in any reasonable quantity). Even better, it more efficiently uses space than the Ikea shelving that we have used in the past, meaning that we can get the numbers of bottles we have previously stored into a much smaller space, and (given that our cellar is larger) ultimately have the capacity for a much, much larger number of bottles down the road (which is also no bad thing).

What remains now is to measure and plot, and to figure out a configuration that will work for now and provide expansion possibilities into the future. This also means that Ikea has lost one of its last footholds into our house. After the wine shelving, there is only Billy bookshelves left. And they had better not stop making those. If they do, there will be hell to pay.

Engaging A Designer

In order to satisfy ourselves on the financing requirements for the house, Dianne and I want to get a sense of what we are looking at in terms of renovations on the new property.

For the sake of convenience (and budget), we’re staging the modifications that we make. The first plan is to get the house itself in order, which largely involves renovating the kitchen and two bathrooms, and making some minor changes to the basement to accommodate a media room and wine cellar. Later, we’ll worry about the office and coach house, and still later we’ll tackle storage for the motorcycles and a workshop. Somewhere along the way, we will also build a wall.

A designer and contractor that we referred to quite early on in the process was a woodworker and designer who lives, quite literally, down the road. Even better, he had done all of the previous major renovations on the house, including building the coach house, construction of the addition and renovation of the kitchen. A fairly obvious place to start, then, in terms of talking about what we planned on doing.

Dianne and I scheduled an appointment for yesterday in order to meet with him, find out more about his work and approach, and walk through the house with him to discuss our planned changes. We met him at his workshop, which is also his house, to review some of his previous portfolio, get a sense of how he works, and have a general conversation before walking through the house.

Simply based upon what we had seen in the past, we were impressed with his work. The great room in the new addition is post-and-beam construction, and not just beautiful but breathtakingly well built. The joints and seams are, well, seam-less, even after 17 years. Seeing his own house provided similar reassurance of his craftsmanship. He is in the process of building an additional sunroom and deck on his house, and currently has the posts and beams up and the framing for the overhead roofing in place. Looking at the construction, he is clearly someone that is painstaking in the details.

Even better, he also has the original drawings from the construction of the addition and the coach house to work from. He knows the house well, likes working there, and is really pleased with the changes that we want to make (which basically address previous shortcomings, or finally tackle challenges that were ignored in earlier renovations – simply because you have to draw the line somewhere).

Both Dianne and I were extremely comfortable talking with Gene from the outset. His process is solid, he wants to work collaboratively, he appears entirely fair and objective in his pricing and and his work is both quality and in keeping with our own tastes. So, despite saying that for any professional you should call around, review qualifications and check experience, our process of finding a designer and general contractor pretty much came down to one meeting, a handshake and a glass of wine. Or two.

In fact, we left five hours after we had arrived. An hour meeting had stretched considerably, and had evolved from a discussion with a potential supplier to a conversation over wine with our future neighbours, telling stories and relaxing in the quiet of a country evening. I suspect we’ll have a few more evenings like that.