An Ikea Odyssey: Part 3

While I had averted dealing with the wardrobes on the first day of construction (with the notable exception of moving nine very large and heavy boxes up a narrow and bending staircase) that just meant that they were patiently awaiting my arrival the next morning.

Wardrobes are like bookshelves, only larger. Much, much larger.

Pax as a wardrobe system is surprisingly flexible but nonetheless relatively uncomplicated. You start with a basic frame, and fill it with whatever bits and pieces are required to create the closet of your dreams, whether drawers, hanger bars, shoe trees or storage boxes. Assembly is, in my experience, best approached in the same way; build the frames and get them to where you want them, and then worry about installing the interior fittings.

According to the plan, the wardrobe units that I had picked should fit pretty well perfectly in our new walk-in closet, without making the space feel overwhelmed. While that may be true, the more wardrobe frames you build, the less space you have for the assembly of future wardrobe frames. The result was the creeping sensation that the walls were closing in. Which,in effect, they were.

If it feels like the walls are closing in, it’s only because they are.

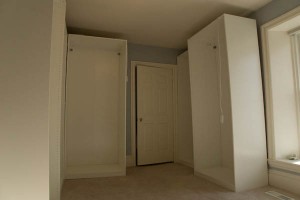
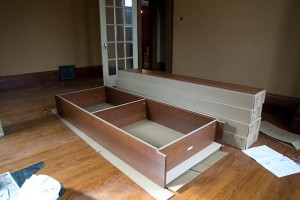
Assembly was relatively straightforward, in that the frames work like bookshelves but on a very large scale. The result is larger, heavier and more unwieldy, but still largely based upon the same principle. Unpack, frame, slide, bang and struggle to get upright. Repeat eight times. By the end of the day, I had nine completed wardrobe frames. Not full wardrobes, mind you, because they were all empty. But the frames were in place.

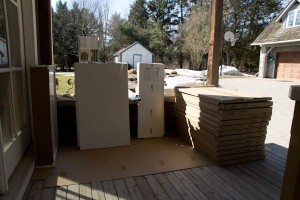
What that meant was an unplanned third day to actually deal with all of the innards that would make the wardrobes functional. I got an early start that Saturday, getting to Boo Manor shortly after 9am. The first order of business was figuring out where to assemble everything. The old kitchen island is still on the front porch, and has been used as everything from a desk to a workbench so far during the renovation; that would work for me. An hour spent lugging the boxes for the interior out of the garage, and I was ready to get started.

Outdoor Ikea warehouse? Nope, just all the stuff to be assembled.

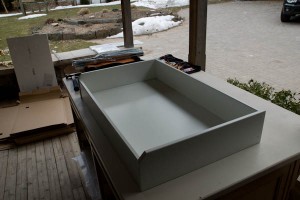
My basic strategy was to fill the contents of one wardrobe at a time. That meant unpacking, assembling and/or building whatever items were required, bringing them upstairs, and installing them in the appropriate wardrobe frame. Many of those innards were drawers. These were each their own little assembly sub-project, individually wrapped with their own little packet of screws and hardware. By the time I was finished, twenty-six drawers later, assembly time for a single drawer was less than five minutes.

A drawer. One of 26. By the end, assemble was sub-five-minutes.

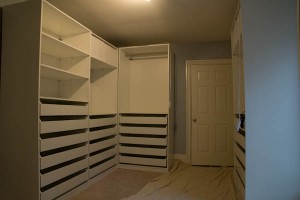
Possibly the most excruciating item to assemble was a shoe rack, however. Appealing in principle, the rack rolled into a frame and offered storage for up to 12 pairs of shoes. What that translates into in reality is 24 little metal tubes that need to be separately bolted to the rack with Ikea’s trademark Allen key, one at a time. After that, 24 little plastic shoe forms needed to be clipped into place, before the whole thing could be installed. Great result, but I’m glad that I had to only build one of them.

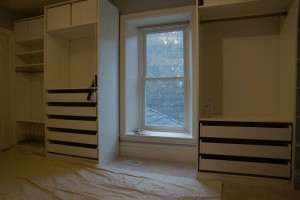
The finished product. With lots of drawers.

Despite the early start, the process lasted the entire day. As 6:30 rolled around on the clock, I was finally in the process of cleaning up, packing my tools and getting ready to drive back to the city. Behind me, I left five bookshelves and nine completed wardrobes, ready for us to move in. Impressively, when all was said and done, there was not a single missing piece of hardware or damaged panel. No emergency return trips to Ikea required, and any swearing and cursing regarding the process of assembly was entirely my own doing.

Astonishingly, it all fit. And went together. With no missing hardware or damaged pieces.

An Ikea Odyssey: Part 2

I am not female, so this is entirely speculation on my part, and may just result in either censure or hysterics from the women in my life who know better. But I suspect that building Ikea furniture is a little like childbirth: the pain of the act eventually fades until you reach a point where you are bafflingly willing to consider doing it again.

Recognizing that assembly would be a mammoth undertaking, I had in fact booked off two days to assemble all of the various bits of Ikea. This might seem excessive to some, and laughably inadequate to others. It was, on balance, my best-guess estimate of what it would take based upon previous assemblies. Like I said, the pain fades…

It had been my original intent to start with the wardrobes, and move on to the bookshelves (under the basic presumption that if you tackle the worst of it first, it all starts to look downhill from there). Unfortunately, those plans went out the window pretty much at the outset. I couldn’t lift the wardrobes on my own (one box weighs in at something approaching 140 lbs. of unwieldy, eight-foot long box) and the help that I had beseeched wouldn’t be arriving until later in the morning. So we’ll start with the bookshelves instead.

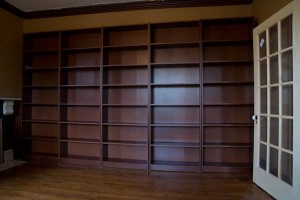
One bookshelf down, four to go. Unpack, frame, assemble; repeat as necessary.

Over the years, I have built many Billy shelves. It is the ubiquitous, go-to solution for large, cost-effective and relatively sturdy book storage, and has been for some time. Although I have to say that the quality of Billy has declined over time; like so many of us, his early strength and burnished looks have sagged and faded. The overall finished product look roughly the same, but the quality of the parts and materials has declined—presumably in an effort to keep costs down. Higher density fibre board is now particle board; metal parts are now plastic. Had I been aware of how much they have changed between now and this time around, I’m not sure I would have still gone there.

While this might just be a case of buyers remorse, it wasn’t going to get the bookshelves assembled. There was really nothing for it but to get on with building them. The mechanics of assembly is pretty straightforward, and you quickly fall into a zen-like routine of unpacking, framing, sliding, hammering and inserting fiddly doo-hickies. The entire process is hard on the knees, but otherwise surprisingly meditative.

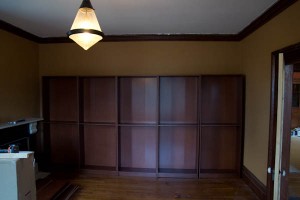
I didn’t realize quite how well they would fill the wall…

I had measured the room to figure out how many shelves would fit along the wall, which gave me five boxes to assemble (plus extensions). While I knew they would fit, I didn’t realize quite how closely they would match the room’s dimensions. By the end of the day, I had a wall of shelves. They actually fill the room quite perfectly. And match the colours of the existing woodwork surprisingly well. After some adjustments to deal with the fact that the floor is not as flat as I might like, I was able to finish my day with the bookshelves completed.

One day down, one completed wall of shelves.

For pre-fabricated shelves, they are perfectly serviceable, although I do miss the Billys of old. I have no plans on moving these any time soon, however. So as long as they stay where they are, they should hold up reasonably well.

An Ikea Odyssey: Part 1

Trigger warning: Contains references to the assembly of flat-pack furniture on a massive scale.

There are possibly fewer words capable of creating both dread and joy in the hearts of Canadians than ‘Ikea’. Only four letters long, it nonetheless has the power to convey ‘cost effective furniture’, ‘you won’t make it through the marketplace for less than $200’, ‘swedish meatballs’, and ‘some assembly required.’ Name me another word that can do all that.

I have purchased, assembled, moved, repaired, discarded and replaced a massive amount of Ikea furniture in the years I have spent roaming the planet. I vividly remember my very first bookshelves, which made something on the order of 20 moves before finally succumbing to a tragic demise as laminate delaminated and particle board crumbled. They went on to be replaced by many, many more bookshelves over the years.

The move to Boo Manor would require further purchase, carrying, assembly and installation of Ikea furniture. Namely, Billy bookcases and Pax wardrobes. On a scale that would probably be troubling if I thought about it too hard. Particularly given that the first act before actually shopping at Ikea was renting a 15-foot cube van.

The first challenge, of course, was building a shopping list. That required its own, separate trip to Ikea, just to plan out how we were going to lay out the wardrobes. In the near future, we have plans to annihilate the walk-in closet in the master bedroom in favour of reclaiming the space for a much larger en suite bathroom. In place of this, we have annexed one of the other bedrooms with the intent of making it our new walk-in closet.

Showing up at the checkout with four heavily laden carts is perversely satisfying.

Having figured just how many Pax wardrobes of varying sizes and shapes could fit in our new closet, we needed to figure out how to fill them. That turned into a very large shopping list, which in turn transformed into a quest to find the nearest store with sufficient stock to supply us. This is actually made surprisingly easy by Ikea’s web site, which allows you to not only build a shopping list online but also to identify what stores have stock, and when they expect to have more. Even better, you can sort your list by warehouse location or (more relevantly) weight.

Armed with shopping list and current inventory amounts, we descended on the Burlington Ikea shortly before opening with the plan of a well executed surgical strike. At least, as well executed as possible when armed with a three-page shopping list. There is something deeply satisfying, however, about descending upon the checkout line with no less than four fully laden carts of boxes and seeing the look of consternation and horror of whoever has to ring all that through.

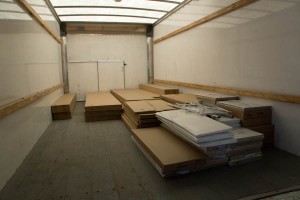
Whatever joy that might have produced quickly faded with the prospect of loading the truck (and then unloading it at the other end). Especially when you amply demonstrate that the 15-foot truck was actually necessary. All in all, our shopping odyssey took about three hours. Add in driving it all out to the house, with a stop to pick up more furniture along the way, and then unloading it all at the other end, and your are dealing with an entire day’s adventure.

It’s all fun and games until you have to load the truck. And disturbing that you need a truck.

And not a single box has yet been opened…

For Want Of A Hinge (Part 1)

One of the fundamental truths of renovating a very old house is that you never know what you are going to find. Normally, that means that you are going to discover things that you wish you hadn’t (and that will ultimately wind up being far more expensive than you wanted to know). In this case, however, gutting the bathroom resulted in a very pleasant surprise.

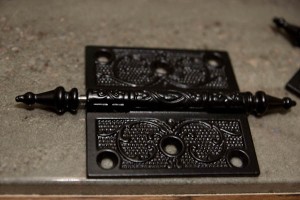
It turns out that all of the doors on the upper floor of the original house are original, and are hung on their original hinges. Said hinges have since been painted over many, many times now, of course, but they are – once numerous layers of paint are finally removed – absolutely beautiful. Keelan took the set from the bathroom door to see what he could do with them. After torching them, scrubbing them, brushing them and repainting them, they turned into something pretty spectacular.

I didn’t even know they made hinges like this. Now I need to figure out where I can buy them.

Of course a discovery like this leads to the inevitable comment, “Wouldn’t it be cool if we could get more of these for the doors downstairs?” So, truth be told, even the positive surprises can wind up getting expensive. The question to be asked in all of this, however, is where one needs to go in order to find such hinges. Certainly they’re not something that you’re going to find in stock in your neighbourhood Home Depot.

There was some question even then about what kind of hinges they were, and whether or not they were in fact antique. The back of the hinges were stamped ‘3 1/2″ x 3 1/2″‘, which even today is a pretty standard size in the way of hinges. The offset pattern for the screws looks pretty similar to modern hinges. And one had to ask the question of whether, back in the late 1800s, they were as organized as all that as to be making standard size hinges, and then taking the time to make impressions in the back specifying just what size they were.

And so, we had a mystery on our hands. One I took it upon myself to attempt to solve as best that I could. Given that there were four doors in the downstairs of the old house (to the basement, to the front hallway, to Dianne’s den and to a new door on my den), the objective was to find four new sets of hinges to match the ones in the rest of the house. And really, how hard could that be?

The first stop in this particular odyssey was Addison’s. For anyone who has renovated anything in Toronto, they will know that Addison’s is the one-stop go-to place for reclaimed hardware of just about any size, shape and colour. It has also been profiled in just about every issue of Toronto Life’s annual “Where To Get Good Stuff Cheap,” for those who are slightly less tuned in. Just off of Sorauren in Toronto’s west end, Addison’s started off as a plumbing company run by Jim Addison, who started off in plumbing and heating in his native Scotland more than 50 years ago.

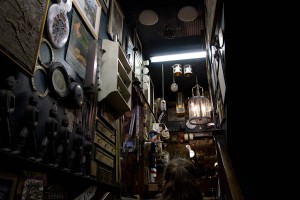
The entryway to Addison’s. Spectacular, bewildering and awesome in equal measure.

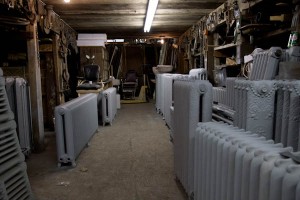
Today, Addison’s is still in the plumbing and heating business – with a three floor warehouse full to the brim of plumbing, electrical, hardware and heating products. They salvage what can be salvaged from houses that are being gutted, renovated or torn down, and sell the results to those who are gutting, renovating or tearing down their houses. If you have a hot water radiator that needs replacing, these are the people to see – they refurbish and restore old ones, as well as selling all the hardware necessary to keep them running.

Radiators are an Addison’s specialty. If you still heat with water, you need these guys.

Addison’s also has an absolutely ridiculous number of plumbing fixtures of every shape, size, purpose, colour and condition imaginable. It is truly spectacular, and organized mostly by category – so there is a reasonable chance of finding what you are looking for, located in proximity to all of the other examples of what you are looking for.

Plumbing fixtures of every size, shape, style, era and usability.

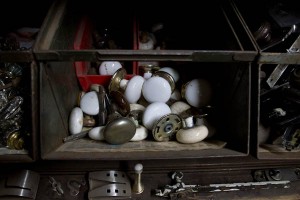
One of the things that they did have, to my surprise and absolute delight, was porcelain door knobs. Apart from replacing the hinges in the lower doors of the house, we are also wanting to replace the door knobs, which are an eclectic mix from several periods, none of which are actually from when the house was built. Briefly distracted, I was able to assemble three full sets of door knobs (at least, I was able to assemble the knobs, if not any of the other hardware I needed). Not knowing what was required in terms of latch sets (and recognizing the bewildering array of latches actually available) I wisely (in my opinion) left that decision for another day.

Door knobs! They have door knobs! Porcelain ones, and many more besides.

After a delightful exploration of a spectacular, if bewildering, array of stuff, we left with our knobs, but sadly not with our hinges. Stock depends upon what is coming out of houses that are being gutted, and most of the hinges they had were slightly worn and tarnished versions of what you would get from your local hardware store. The search would have to continue.

Knobs & Tubes & Angst. Oh My.

As mentioned in the post about our house inspection, our lovely new home has a minor infestation of knob and tube wiring. Very minor. Hardly noticeable. Negligible, in fact.

Sadly, however, the words ‘knob and tube’ strike fear into an insurer’s heart faster than almost any other words on the planet, save, perhaps “bayou”, “levee”, “Brownie” and “it’s a little breezy today, don’t you think?”

To put what we are dealing with in context. As we’ve already established, we are buying a very old house. Old enough that Canada wasn’t even a country in short pants when it was built. And old enough that electricity was yet a twinkle in Thomas Edison’s eye (or whatever other bodypart first got the twinkle and buzz). So wiring wasn’t something that was ever even considered.

Around the turn of the century, however, it was fashionable to install this new-fangled electric-light-thingy that everyone was going on about. And so plaster was fussed with, wires were run, switches were installed, and people got very stern warnings about what to plug into where. (Even a few decades on, for example, guests of the Empress Hotel in Victoria were encouraged to let the building electrician plug in their hairdryer for them. Honest).

The wiring that was installed was called ‘knob and tube’. Mostly because the wires (copper insulated wires, I might add) were periodically wrapped around ceramic knobs when strung for long distances, and when they had to pass through a beam a ceramic tube was first inserted in the hole and the wire then passed through it. A few other odd conventions were occasionally employed, like fusing the hot and the ground wires, which meant that a blown fuse didn’t mean there wasn’t power to the circuit. But these were early days, and people were still experimenting. As people will do. So we shall forgive them their youthful transgressions.

Of course, back when this wiring was originally installed, people didn’t normally have computers, multiple cell phones, bread makers, fridges and hairdryers all vying for the juice. People eased into their addiction to all things electrical with just a few lights at first. But then, of course, they upped their demands. In time, more and more things with plugs entered the house. And eventually people discovered that if you plug too many things into one circuit then bad things can happen. And so we evolved to our current state of 200 amp panels, plugs every six feet and a well-populated double row of circuit breakers.

Find an old house, however, and chances are there is still some old wiring in it somewhere. And so there is in ours. In one room. On one circuit. We know, because we checked. The light in the dining room is fed by knob and tube wiring. It eventually merges in a junction box in the basement to modern wiring, connected to a shiny new circuit breaker, in an impressively immaculate panel. But that one stretch of the dining room wall and ceiling? Yup. Knob and tube.

Looking at where the switch of the dining room is installed, it is easy to understand why this wasn’t replaced when the rest of the house was rewired. Below the wall in question is the stone foundation of the house, so there is no way into the wall from below. The only way to replace the wiring would be to rip through the plaster of the dining room wall and ceiling, which is not something that is easy to do without the subsequent repairs to the plaster being blindingly obvious. At which point, a small problem would become a very, very large mess indeed. Far easier to just leave that one stretch of wire safely where it is.

So the previous owner clearly thought. So we thought. So the home inspector thought, when it came to that. Our insurer? Our insurer, when we mentioned the fact, had other ideas. Now, you could argue that it would have been better to shut up about the whole thing. But failing to disclose material information can lead to a whole world of other issues I would have preferred to avoid. So yes, we told them. Their first, and least helpful, suggestion was to disconnect the light. And the discussion just proceeded from there.

To provide some perspective, knob and tube wiring is safe. At least, it is not inherently unsafe, provided certain basic (and really rather common sense) provisions are adhered to. In fact, a quick search of the internet reveals that Ontario’s Electrical Safety Authority, whose business it is to fuss about these sorts of things, is quite comfortable about the whole issue of knob and tube wiring. In fact, they’ve gone to some effort to publish a position paper on knob and tube wiring that not only provides clear reassurance that such installations are safe, but also that they meet current code and “…may still be installed to this day.”

So armed, I was fairly confident in negotiating with the insurance company. I had facts and knowledge on my side, and the Electrical Safety Authority at my back. What I didn’t count on, however, was the obstinancy of actuaries armed with large underwriting rule books. Despite my broker putting up a strong and sustained argument on our behalf (for which I am grateful), the closest we got to a compromise was an offer to accept the installation if we promised not to add any more switches or outlets on the line, and we got an inspection from the ESA verifying the installation was safe.

This was a victory of sorts, I suppose, but still required more work on our part (not to mention another day of my time, arranging another inspection with the vendor and a payout of about $266). All to inspect something that is already safe, and that the insurer would probably still get uppity about if there ever was a problem down the road.

And so how did we solve this little challenge? Well, in this particular instance, we simply took the high road and found another insurer. One familiar with rural properties, comfortable with the fact that older homes do have instances of knob and tube and happy to still insure the home in its current state. And, in fact, one who was already insuring the property.

Several weeks on, we finally have insurance. In another five days, the transaction will close. And then, we’ll own a house again. All rather exciting, really.