Spring Has Sprung

Just a couple of weeks ago, everything was under water. Late winter snowstorms, a lot of rain and still-frozen ground conspired to turn much of the surrounding countryside into one giant puddle. The local river had breached its banks, and most farmers’ fields looked like lakes. After several mild years, this year we actually had winter.

Flood waters overflow the river banks

Flood waters overflow the river banks

Miraculously, however, spring has come to Boo Manor. Within four days, we have gone from barren trees to budding branches. The floodwaters have receded, and flowers are poking their heads above ground.

Cherry blossoms are already well advanced

Cherry blossoms are already well advanced

I stopped by the house to drop off our refinished china cabinet yesterday, and was completely overwhelmed by how much the garden had changed in just a few short days. The cherry blossoms were in full bloom. One of the gardens was a riot of colour, with tulips, early clematis and hyacinth already well advanced in growth.

The garden is already a riot of colour

The garden is already a riot of colour

In all, the garden is starting to look spectacular, reinforcing once again what made us fall in love with this property. The lawn is green, and by the end of the week all of the trees should have healthy leaf growth. Already, there is enough that the rustle of the wind sounds like ocean surf. It will be wonderful to actually move in, and watch the progress on a daily basis.

The garden in all its glory

The garden in all its glory

On The Rack

If building Ikea is like putting together a lego house, then assembling wine racking is more like building something out of Linkin’ Logs. Or a giant Jenga game.

As I had mentioned in an earlier post, I came to regret leaving the old wine cellar racking in Edmonton, when I discovered that Ikea no longer made it. Or at least, that they had changed it. Interestingly, in this case it has become more expensive. Based upon their Gorm shelving system, it used to be a really cost effective way of storing your wine bottles. The cost has effectively doubled, in that you need both a shelf and a rack frame, rather than what was essentially a shelf with some slats nailed to it. It wasn’t pretty, but it was functional, and my philosophy had always been to spend money on the wine, rather than the storage.
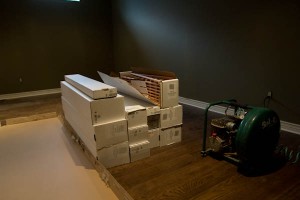
This is an entire wine cellar. Some assembly required.

Fortunately, I found a solution at Rosehill Wine Cellars, using their modular redwood wine racks. They are surprisingly cost effective (a little more than Ikea’s current solution, but a whole lot nicer on the eyes) and flexible. I had done some planning over the winter, and had managed to come up with a configuration that would work in the new cellar and meet our storage needs.
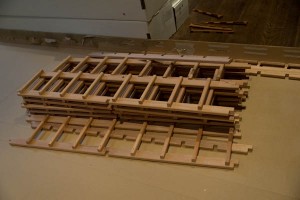
Like playing Jenga. Your challenge is to take all of this…

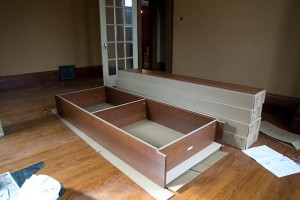
The next challenge was to actually build it. What I picked up Rosehill Wine Cellars was a variety of very small, very light boxes (at least, when compared to Ikea wardrobes). Opening said boxes, however, revealed a pile of wood pieces strategically cut and notched, all of which had to be assembled to create said rack. Preferred assembly technique was to use a nail gun, and a huge number of nails.
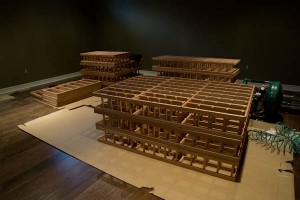
…and turn it into this. Without nail-gunning your finger, the floor or anyone else.

I started with a base, which I managed to cobble together using melamine-covered particle board and adjustable legs from Lee Valley Tools. This gave me a strong base that could be adjusted in order to make it level, and should pretty much disappear visually once the racking was built and stocked with bottles.
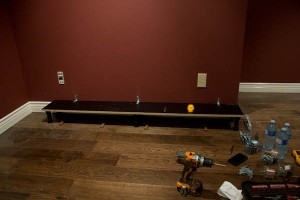
The base. Melamine covered particle board, and adjustable feet. It’s level, and that’s what matters.

The base was the easy part. Then it got to building the individual racks. Once you had reviewed the instructions and built one, the rest became logical. Fiddly, but logical. The challenge was to assemble all of the pieces to create a rack, manage to get it square, and then nail the corners in place without everything falling back apart. There were instances where that required a good five or six attempts to accomplish.

What was left at the end of the day was a set of assembled racks that were ready for installation. This involved attaching brackets to each rack, and bolting them to the wall behind using drywall anchors and screws. Conceptually, this is something fairly straightforward and logical. The reality is that the depth of the racks when installed is 9″, which means you need a very long screwdriver or very small hands to fit them inside the rack. I had neither.

MacGyvering a very long screwdriver. Kids, don’t try this at home.

What I did have, however, was a power drill and a number of screwdriver bits. That, connected with two quick-change bits, gave me a long—but ridiculously unwieldy—screwdriver head. Torque suffered, and I’m sure there are any number of health-and-safety professionals that would have conniptions over my technique, but it got the job done.
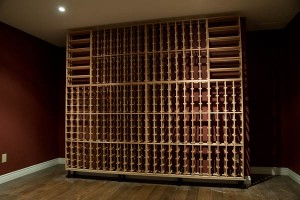
The finished result. Custom look, cost effective prices.

The end result is that we now have a wine cellar that, for a reasonable amount of money, looks pretty damned awesome. It’s not a custom racking solution by any stretch of the imagination, but those can run into the tens of thousands of dollars (and again, who wants to spend that much on storage when you can be out buying wine instead?) But at the sometime, it very nearly looks like a custom solution. And even better, it has capacity for something north of 830 bottles. Which should keep us going for awhile.
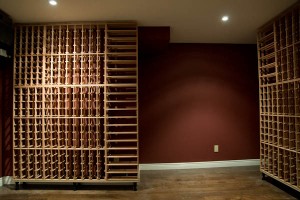
More space for expansion. Spend money on wine, not storage.

We do have room for expansion, though, should we need it.
An Ikea Odyssey: Part 3

While I had averted dealing with the wardrobes on the first day of construction (with the notable exception of moving nine very large and heavy boxes up a narrow and bending staircase) that just meant that they were patiently awaiting my arrival the next morning.

Wardrobes are like bookshelves, only larger. Much, much larger.

Pax as a wardrobe system is surprisingly flexible but nonetheless relatively uncomplicated. You start with a basic frame, and fill it with whatever bits and pieces are required to create the closet of your dreams, whether drawers, hanger bars, shoe trees or storage boxes. Assembly is, in my experience, best approached in the same way; build the frames and get them to where you want them, and then worry about installing the interior fittings.

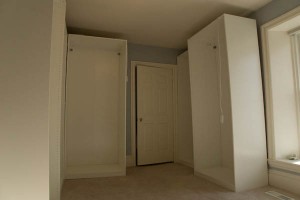
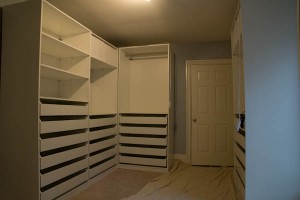
According to the plan, the wardrobe units that I had picked should fit pretty well perfectly in our new walk-in closet, without making the space feel overwhelmed. While that may be true, the more wardrobe frames you build, the less space you have for the assembly of future wardrobe frames. The result was the creeping sensation that the walls were closing in. Which,in effect, they were.

If it feels like the walls are closing in, it’s only because they are.

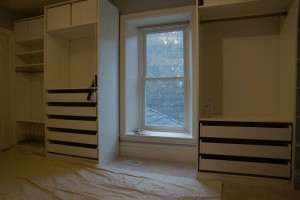
Assembly was relatively straightforward, in that the frames work like bookshelves but on a very large scale. The result is larger, heavier and more unwieldy, but still largely based upon the same principle. Unpack, frame, slide, bang and struggle to get upright. Repeat eight times. By the end of the day, I had nine completed wardrobe frames. Not full wardrobes, mind you, because they were all empty. But the frames were in place.

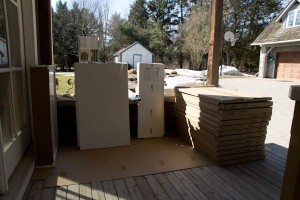
What that meant was an unplanned third day to actually deal with all of the innards that would make the wardrobes functional. I got an early start that Saturday, getting to Boo Manor shortly after 9am. The first order of business was figuring out where to assemble everything. The old kitchen island is still on the front porch, and has been used as everything from a desk to a workbench so far during the renovation; that would work for me. An hour spent lugging the boxes for the interior out of the garage, and I was ready to get started.

Outdoor Ikea warehouse? Nope, just all the stuff to be assembled.

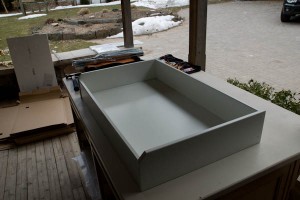
My basic strategy was to fill the contents of one wardrobe at a time. That meant unpacking, assembling and/or building whatever items were required, bringing them upstairs, and installing them in the appropriate wardrobe frame. Many of those innards were drawers. These were each their own little assembly sub-project, individually wrapped with their own little packet of screws and hardware. By the time I was finished, twenty-six drawers later, assembly time for a single drawer was less than five minutes.

A drawer. One of 26. By the end, assemble was sub-five-minutes.

Possibly the most excruciating item to assemble was a shoe rack, however. Appealing in principle, the rack rolled into a frame and offered storage for up to 12 pairs of shoes. What that translates into in reality is 24 little metal tubes that need to be separately bolted to the rack with Ikea’s trademark Allen key, one at a time. After that, 24 little plastic shoe forms needed to be clipped into place, before the whole thing could be installed. Great result, but I’m glad that I had to only build one of them.

The finished product. With lots of drawers.

Despite the early start, the process lasted the entire day. As 6:30 rolled around on the clock, I was finally in the process of cleaning up, packing my tools and getting ready to drive back to the city. Behind me, I left five bookshelves and nine completed wardrobes, ready for us to move in. Impressively, when all was said and done, there was not a single missing piece of hardware or damaged panel. No emergency return trips to Ikea required, and any swearing and cursing regarding the process of assembly was entirely my own doing.

Astonishingly, it all fit. And went together. With no missing hardware or damaged pieces.

An Ikea Odyssey: Part 2

I am not female, so this is entirely speculation on my part, and may just result in either censure or hysterics from the women in my life who know better. But I suspect that building Ikea furniture is a little like childbirth: the pain of the act eventually fades until you reach a point where you are bafflingly willing to consider doing it again.

Recognizing that assembly would be a mammoth undertaking, I had in fact booked off two days to assemble all of the various bits of Ikea. This might seem excessive to some, and laughably inadequate to others. It was, on balance, my best-guess estimate of what it would take based upon previous assemblies. Like I said, the pain fades…

It had been my original intent to start with the wardrobes, and move on to the bookshelves (under the basic presumption that if you tackle the worst of it first, it all starts to look downhill from there). Unfortunately, those plans went out the window pretty much at the outset. I couldn’t lift the wardrobes on my own (one box weighs in at something approaching 140 lbs. of unwieldy, eight-foot long box) and the help that I had beseeched wouldn’t be arriving until later in the morning. So we’ll start with the bookshelves instead.

One bookshelf down, four to go. Unpack, frame, assemble; repeat as necessary.

Over the years, I have built many Billy shelves. It is the ubiquitous, go-to solution for large, cost-effective and relatively sturdy book storage, and has been for some time. Although I have to say that the quality of Billy has declined over time; like so many of us, his early strength and burnished looks have sagged and faded. The overall finished product look roughly the same, but the quality of the parts and materials has declined—presumably in an effort to keep costs down. Higher density fibre board is now particle board; metal parts are now plastic. Had I been aware of how much they have changed between now and this time around, I’m not sure I would have still gone there.

While this might just be a case of buyers remorse, it wasn’t going to get the bookshelves assembled. There was really nothing for it but to get on with building them. The mechanics of assembly is pretty straightforward, and you quickly fall into a zen-like routine of unpacking, framing, sliding, hammering and inserting fiddly doo-hickies. The entire process is hard on the knees, but otherwise surprisingly meditative.

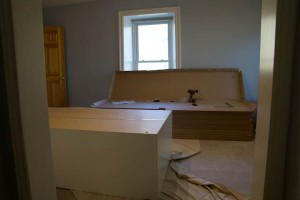
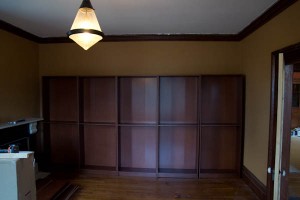
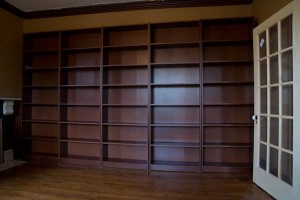
I didn’t realize quite how well they would fill the wall…

I had measured the room to figure out how many shelves would fit along the wall, which gave me five boxes to assemble (plus extensions). While I knew they would fit, I didn’t realize quite how closely they would match the room’s dimensions. By the end of the day, I had a wall of shelves. They actually fill the room quite perfectly. And match the colours of the existing woodwork surprisingly well. After some adjustments to deal with the fact that the floor is not as flat as I might like, I was able to finish my day with the bookshelves completed.

One day down, one completed wall of shelves.

For pre-fabricated shelves, they are perfectly serviceable, although I do miss the Billys of old. I have no plans on moving these any time soon, however. So as long as they stay where they are, they should hold up reasonably well.

Project Doorknob

Since acquiring Boo Manor, the importance of door hardware – and installing the correct door hardware – has become something of a fetish for me. An odd fetish to be certain, and also not a cheap one.

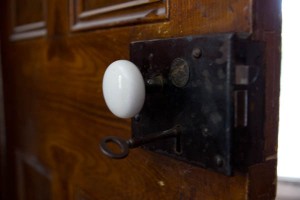
Seren had done some research, and typically porcelain door knobs would have been used in a house of this era, which makes the motley collection of glass, brass and metal doorknobs oddly inappropriate. And I have already well-documented the quest for appropriate door hinges. My shopping trips through southern Ontario had yielded an impressive collection of porcelain-knob related door hardware from a variety of vintages, but there still remained the challenge of putting it all together and making it work.

Installation was complicated by the fact that we also had a variety of different door vintages to work with. Two of the doors off the dining room were modern, and had the usual two-inch hole for the door handle hardware to be mounted in. This left us with two choices: use modern door hardware, or replace the doors. Replacement was neither practical nor overly cost-effective, so newer door handles were the way to go here. The door to the basement and the outside (because yes, our dining room has an exterior door) are the same age of the house, and use the old-style iron bar through a much tinier door whole. And the door to my den didn’t even exist, which opened up our options on that front quite considerably.

I had, at Addison’s in Toronto, found porcelain doorknobs that looked older but weren’t. In fact, a minimal amount of internet research revealed that they were Australian, made by a company called Gainsborough, and brand new ones could in fact be bought at local hardware stores. The ones that I had purchased had been recovered from a house somewhere in Toronto, and had enough of a patina of age and use as to be plausible in the dining room. The downside was that they also had horribly gaudy fake-brass-rosettes (and Dianne is already planning for the eradication of all brass door hardware from Boo Manor) that certainly don’t count as period.

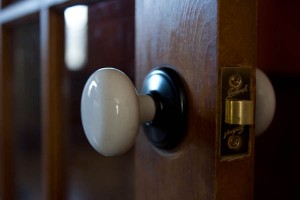
Painted rosettes and a new, used doorknob. If that makes any sense whatsoever.

The doorknobs from Addison’s were new enough, however, that they would work in the mounting holes of the newer doors. Assuming that I had the appropriate door hardware to finish the job. The tubular latch sets (the little pokey-slidey things that go in the side of the door, with the spring loaded doo-hickey that actually holds the door closed) that were there didn’t work with the new doorknobs. And I was a couple of screws short of a mounting solution for them (and no, I don’t need to hear your rude comments about this plight).

Why Gene has a stockpile of Gainsborough hardware I don’t know, but I’m desperately grateful that he does.

Fortunately, and coincidentally, Gene has in the past made extensive use of Gainsborough doorknobs, and has a box full of old parts, screws, mounting plates and latches (not to mention two brand new doorknob sets, if desperation truly set in) that he was happy to let me graze through. And for reasons that escape me, the box yielded up two tubular latch sets (still in their packaging) that were exactly what I needed to finish off the doors. The brass rosettes got a coat of Tremclad semi-gloss black paint (adding significantly to the fumes that were already wafting about courtesy of the floor refinishing) and I now had two sets of newer doorknobs that looked slightly used and should actually work in the doors.

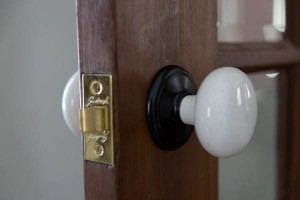
The door to the basement. You’d never know the doorknob hadn’t always been there.

The doors to the basement and outside were easier to manage, on a relative scale. It had been recommended that the porcelain knob that would be outside be sealed, to help it resist weathering over time, but the installation was mostly straightforward. The basement door just required a replacement of knobs. The exterior door was a slightly different challenge, in that I needed a cross-bar long enough to make it through the door and the surface-mount lockset. By astounding coincidence, however, one of the cross-bars that I had picked up at Addison’s under the mistaken assumption that it would work with the Gainsborough doorknobs was the exact length I needed for the exterior door.

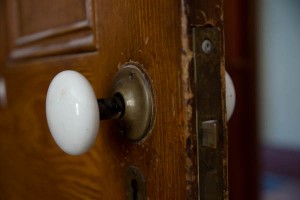
This doorknob used to be glass. And was completely unattached to the door. Talk about unhinged.

And so, the jigsaw puzzle that has been Project Doorknob has come to a successful conclusion, and we now have five doors in or near the dining room that all have period(ish) porcelain knobs. And I only lost a few brain cells from paint fumes and whatever it was that the floor refinishers were using. I’m calling that a win.

An Ikea Odyssey: Part 1

Trigger warning: Contains references to the assembly of flat-pack furniture on a massive scale.

There are possibly fewer words capable of creating both dread and joy in the hearts of Canadians than ‘Ikea’. Only four letters long, it nonetheless has the power to convey ‘cost effective furniture’, ‘you won’t make it through the marketplace for less than $200’, ‘swedish meatballs’, and ‘some assembly required.’ Name me another word that can do all that.

I have purchased, assembled, moved, repaired, discarded and replaced a massive amount of Ikea furniture in the years I have spent roaming the planet. I vividly remember my very first bookshelves, which made something on the order of 20 moves before finally succumbing to a tragic demise as laminate delaminated and particle board crumbled. They went on to be replaced by many, many more bookshelves over the years.

The move to Boo Manor would require further purchase, carrying, assembly and installation of Ikea furniture. Namely, Billy bookcases and Pax wardrobes. On a scale that would probably be troubling if I thought about it too hard. Particularly given that the first act before actually shopping at Ikea was renting a 15-foot cube van.

The first challenge, of course, was building a shopping list. That required its own, separate trip to Ikea, just to plan out how we were going to lay out the wardrobes. In the near future, we have plans to annihilate the walk-in closet in the master bedroom in favour of reclaiming the space for a much larger en suite bathroom. In place of this, we have annexed one of the other bedrooms with the intent of making it our new walk-in closet.

Showing up at the checkout with four heavily laden carts is perversely satisfying.

Having figured just how many Pax wardrobes of varying sizes and shapes could fit in our new closet, we needed to figure out how to fill them. That turned into a very large shopping list, which in turn transformed into a quest to find the nearest store with sufficient stock to supply us. This is actually made surprisingly easy by Ikea’s web site, which allows you to not only build a shopping list online but also to identify what stores have stock, and when they expect to have more. Even better, you can sort your list by warehouse location or (more relevantly) weight.

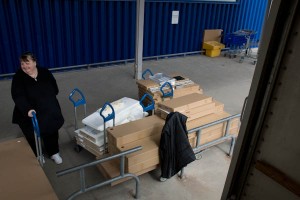
Armed with shopping list and current inventory amounts, we descended on the Burlington Ikea shortly before opening with the plan of a well executed surgical strike. At least, as well executed as possible when armed with a three-page shopping list. There is something deeply satisfying, however, about descending upon the checkout line with no less than four fully laden carts of boxes and seeing the look of consternation and horror of whoever has to ring all that through.

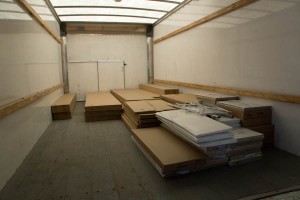
Whatever joy that might have produced quickly faded with the prospect of loading the truck (and then unloading it at the other end). Especially when you amply demonstrate that the 15-foot truck was actually necessary. All in all, our shopping odyssey took about three hours. Add in driving it all out to the house, with a stop to pick up more furniture along the way, and then unloading it all at the other end, and your are dealing with an entire day’s adventure.

It’s all fun and games until you have to load the truck. And disturbing that you need a truck.

And not a single box has yet been opened…

A Little Here, Some More There…

Work continues at Boo Manor. Things have been happening on many fronts, so it’s difficult to keep track of it all. As well, progress becomes harder to monitor just because everything is moving forward a little bit with each crew, day be day. In the last few weeks, we’ve had painting, flooring installation, flooring refinishing and electrical fixture installation all happening more-or-less at once. With a few side projects for good measure.

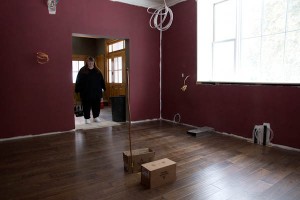
Dianne checks out the kitchen. New flooring, first coat of paint, and that lovely, lovely window.

Most of the rooms have now had a coat of paint, and several have had more than one. The front guest bedroom and the great room are essentially done, the kitchen is started, most other rooms have a full coat and the only rooms that have yet to progress much on the painting front are the dining room and Dianne’s den.

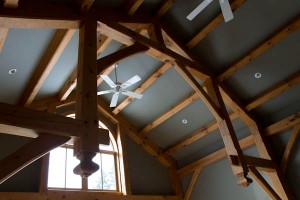
The rooms that are finished look gorgeous. The great room is spectacular; the new colour is darker than what was previously there, but in the same relative tone of green, so while painting was happening it was genuinely difficult a couple of times to discern what was new vs. what was old. Now that it is done, the walls make the wood beams in the space glow with a fabulous warmth.

The great room. Painted, cleaned and beautiful.

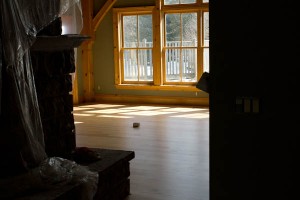
The floor refinishing has also been done in the last week. After 17 years of traffic, the maple floor was showing signs of wear and tear. A crew of three went at it, and what they have accomplished is impressive. The floor looks brand new. Along with Keelan doing a clean-up of the beams themselves (they had accumulated a few years worth of dust) the overall impression is stunning.

The refinished great room floor. All ready for another 17 years of service.

My den is coming along nicely as well. The paint colour is awesome. It’s the colour that I had in my last den, so I know it will work with the furniture. But even better, it works with the woodwork in the rooms. It sets off the wood framing of the windows, and the flooring, spectacularly. And my manly-but-dangly light fixture is now installed (complete with Edison bulb) and is looking pretty sharp, if I do say so myself.

Mark’s den. New and improved, with no more popcorn ceiling!

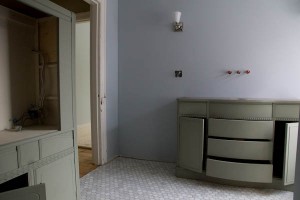
Up in the bathroom, the flooring has been installed and Keelan managed to strip and prime both of the cabinets in preparation for painting. The linen tower that we found was a particular challenge, as it had been waxed. Apparently stripping this involved copious amounts of naphtha and wire wool, and Keelan studiously avoiding letting things catch fire. There is little reward without risk, I suppose. They are now ready to be painted and put back together.

Bathroom cabinets stripped and primed, and the floor tiling installed.

While all this was going on, Dianne and I contributed to the process where we could, mostly be pitching in and doing some carpet cleaning. One Saturday morning not too long ago, we headed out at the crack of dawn to rent a carpet cleaner from Sobey’s, and tackle the carpets. There were some stains that stubbornly resist coming out, but are at least no longer noticeable. The carpets, however, gave up an impressive amount of dirt, grit and animal hair. Several hours of manhandling the cleaner and one pair of wet socks later, the bedrooms are at least clean.

Mark, caught in the closet. Time he cleaned up his act.

In the next couple of weeks, the majority of the work will be completed. Cabinets go in next week, and the painters are back on site. Keelan is busy rehanging doors. The tilers are back in the bathroom finishing up the walls. And I have some furniture to build. That, however, is an entirely different story that will be told at a later date.

Taking Shape. And Colour.

Painting is happening. Within the next couple of days, everything should have had at least an initial coat of paint. Some rooms will in fact be finished.

A lot is happening. Parking is getting scarce. And tight.

I had an opportunity to head up to Boo Manor to check on things, as well as deal with a few appointments with suppliers. Without question, progress is being made. A lot of progress. The house was abuzz with contractors when I arrived; in fact, there was barely room to pull into the driveway. All told, there were eight cars when I got there, and Gene subsequently pulled in behind me.

Painting is underway. The master bedroom, nearing completion.

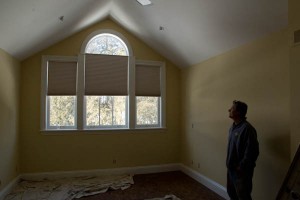
Much work has been done since my last update. Most of the upstairs bedrooms have now been painted, and the final bedroom is underway. When the wallpaper came off in one of the guest bedrooms, much plaster did also; apparently, the walls had never been primed or painted. It sort of makes me wonder about the age of the wallpaper, to be honest, but the result was that there was a lot of damage to the walls, as well as a number of cracks in the plaster from settling. The room needed a full skim coat to repair the damage and prep the room for painting.

The wine room, painted an appropriate colour. With doors that needed to move a little to make way for flooring.

In addition, there have been a number of other creative bits of work going on. The basement is getting proper flooring instead of the linoleum-like surface that is there now. That means that the height of the floor will raise nearly 3/4″. Which means that every door in the basement will no longer function properly. As a consequence, all of the doors need to be raised in their frames to clear the new floors. This has been Keelan’s latest project.

A beam runs through it. Structural yes, but not helpful for projection.
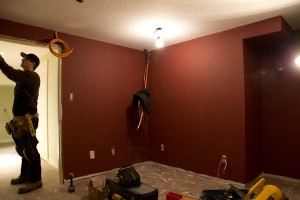
The rest of the basement is now taking shape, as well. The cables have been run for the multimedia (surround sound speakers, as well as video and power for the projector). We’ve figured out how to mount the projector, despite a very large beam bisecting the middle of the basement ceiling. The optimal dimensions of the projection screen (netting out to a very respectable 100″ TV, if we’re going to be comparing size) have been determined.

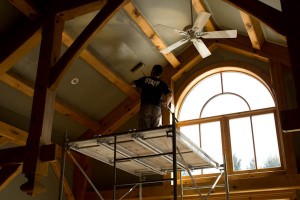
Dave painting the great room. Ladders? For wimps. We’ve got scaffolding.

All in all, Boo Manor is coming together. By the end of this week, priming and first coats on all the painting will be done. All the holes will have been repaired, including a couple of new ones that I discovered today. Flooring is on deck for installation next week. As well, Keelan will be stripping and prepping the vanity and linen cabinet for installation and painting.

Rock Solid and Gorgeous

We did get some good news recently. The granite place has found our ‘Bora Bora’ granite. It’s time for another field trip to London to scope things out.

At this point, we have largely made our colour selections. At least, we think so. As far as the kitchen goes, a lot will depend upon the colouring of the granite. Because there is a lot of colour variation, there could yet be a change in cabinet and wall colours (particularly depending upon whether the granite has an overall ‘cool’ or ‘warm’ cast to it). Much will depend upon what we see when we get a look at the actual slabs going into our house.

The original plan was to have a look at the slabs a week ago. Sadly, that plan changed when Southern Ontario got hit with an impressive and massive snow storm. Mark was supposed to fly in the night before; his flight got cancelled, and driving anywhere that day was strongly inadvisable. As excited as we were to see the granite, the appointment needed to be rescheduled.

As a result of scheduling commitments with both Gene and ourselves, the first time that we could all get out to London was the following Friday. Fortunately, the day was bright and sunny, if still cold and suffering a hangover of the previous week’s storm.

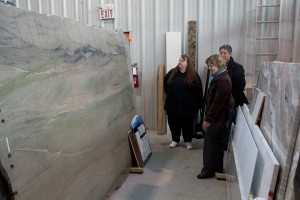
Getting to see our slabs of granite was an awesome experience. We knew that we loved the granite overall, but there were a lot of questions of how all of the colours of the kitchen would come together. We wanted unique and exciting, and we really didn’t want drab; given that many of our preliminary colour choices were technically ‘grey’ (although a green-grey), this was definitely a risk. Given that the colours we had chosen spilled into the yellow end of the spectrum, slabs that had cooler colour tones would not have worked. We would have then been back to the drawing board.

Bora Bora, in all its glory.

The actual slabs we have secured, however, are definitely towards the warm end of things. And they are absolutely, positively gorgeous. Rather than granite, they resemble a sedimentary rock that has been built up in layers. There are tones of green, grey, brown, orange, black and blue, all depending upon where on the slab you are looking. The overall result should be absolutely stunning.

Checking out the granite for the kitchen. It should look amazing.

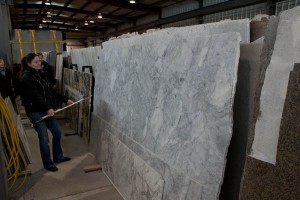
Last time we were out in London, we got so excited picking the kitchen granite that we completely neglected the bathroom. So apart from inspecting the ‘Bora Bora,’ we also had to select a stone for the bathroom counter. The overall design is leaning to a traditional, old-world feel, and something in similar to a marble would be ideal. Marble itself, however, is decidedly NOT ideal. It is a very porous stone, and would quickly become stained from water, toothbrushes and the like. A granite is far preferable, but ideally we want a granite that will have the feel of marble.

The granite for the bathroom. Not marble, but you can see it from here.

We looked at a number of potential slabs, but ultimately went with one that has a lot of ‘texture’ to it. While it is far more ‘grey’ than we had in mind, it should be awesome with the vanity that we’ve selected. The vanity itself will be a deep blue (the actual colour is ‘Indie-go-go.’ Really). It should also play off the tiles that we’ve chosen for the floor and wainscotting beautifully.

Slowly Making Progress

It has been a while since we have posted. Not because no work has been happening, because there has been. But January was a month of personal difficulties, which kept us from many trips to Boo Manor. And there weren’t a lot of major decisions to be made, which has kept the updates down some as well.

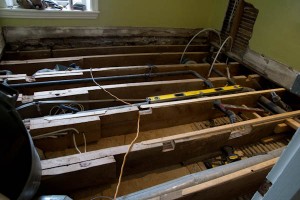
In the meantime, the various work crews have continued to make steady progress on the house. Much of this work will ultimately not be visible, critical though it is. Keelan, for example, spent several days levelling the bathroom floor. This shouldn’t be a big issue, in a room that is about 8′ by 7′, but it surprisingly was. The rough estimate is that the floor varied by as much as 3″ overall, meaning that some parts of the joist had to be shaved down and others needed to be built up. Along the way, some pipes that were perilously close to the top of the joists (and therefore in jeopardy of screw punctures when the floor gets fastened down) needed to be moved. Invisible, all of it, but critical nonetheless.

This is not a level floor. This is not even close to a level floor. But it will be, before we are done.

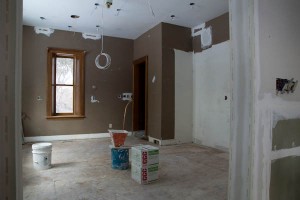
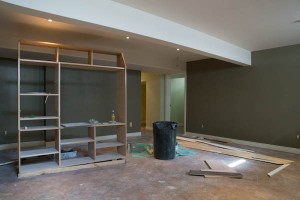
As well, the drywallers have been through. The kitchen and bathroom have now been closed up, various ceilings and walls have been repaired, and the other holes that have been punched out along the way have been cleaned up and repaired. All in all, the house is coming together and we are starting to get a sense of what the finished product will look like.

The kitchen takes shape. There are walls now. Real, live, drywalled walls.

Next up is painting and flooring. Can’t wait.